
Fish It reel in timing is the single most underrated lever in the whole game, because every cast hands the player the same two buttons and the same bite meter, then asks how steady your hands really are. Most beginners mash the click hoping chaos will fill the bar, while veterans treat the bar like a metronome and let luck, bait and patience do the rest. According to the official Fish It page on Roblox, the title advertises more than 1,000,000 possible fish variations, which means the gap between a sloppy clicker and a deliberate reeler compounds into thousands of lost coins over a session. This guide breaks down the cadence, the patience windows and the role of luck so the next cast lands heavier than the last.
The Reel Bar Explained
Before players can fix their timing, they need to know what the bar actually represents and how it reacts to input. The reel bar in Fish It is split into a moving Fish Indicator and a static Catch Zone, and the goal is to keep the indicator bouncing inside the zone until the meter fills. Every click pushes the indicator up while it drifts down on its own, which is the loop that defines click cadence.
What Each Click Actually Does
A click is not a binary "catch or fail" action; it adds a fixed amount of upward momentum to the fish indicator, with diminishing returns if the player clicks while the indicator is already near the top of the catch zone. This is why rapid-fire mashing underperforms a steady, well-paced rhythm. A second click landing at the peak pushes the indicator past the zone, which then has to fall back into range, wasting both the click energy and several seconds of patience window. A beginner guide on the core loop, such as the FULL BEGINNER'S GUIDE on YouTube, frames the action as "click to charge up a cast, click rapidly to reel," but community testing has shown that the phrase "rapidly" is doing a lot of work and is closer to a controlled 2-to-3 clicks per second for most rods.
| Click Style | Clicks Per Second | Indicator Behavior | Average Meter Fill |
|---|---|---|---|
| Mash (panic) | 5+ | Overshoots, bounces wildly | Slow with wasted input |
| Steady (recommended) | 2 to 3 | Stays inside catch zone | Fast and consistent |
| Lazy (under-clicks) | 1 or fewer | Indicator drops below zone | Very slow, often fails |
| Burst-then-pause | 3 bursts, 1 sec rest | Resets to zone center | Decent but inefficient |
Why Patience Matters More Than Speed
A common mistake is treating the bar like a reflex test and ignoring the natural drift speed of the indicator. The drift speed changes with rod tier, fish rarity, weather and a few hidden luck modifiers, so the cadence that works for a starter rod at the Fisherman's Island will not work for a high-tier rod chasing a Forgotten Hydra in late-game waters. Patience means watching the indicator instead of the click button, releasing the mouse when the indicator is already rising, and only adding a click when the indicator has actually fallen into the lower half of the catch zone. Players who internalize this loop consistently report 15% to 30% faster catches than players who click on a fixed timer, according to community data shared on the verified Fish Atelier group page.
Cadence Building Blocks
Cadence is the habit of matching click rhythm to the drift speed of the current fish, and it is the skill that separates a one-time lucky catch from a long-term coin engine. The right cadence also changes based on whether the player is fishing alone, farming low-rarity fish for cash or pushing for high-rarity hunts during an event.
Reading the Indicator in Real Time
A good cadence starts with reading the indicator the way a drummer reads a beat. The position of the fish icon inside the catch zone tells the player when the next click should land. If the icon is hugging the bottom edge of the zone, the player can click immediately; if the icon is near the top, the player should wait for it to fall. This is why a real-time fishing strategy guide, such as the How to Fish in Fish It walkthrough, encourages players to count out the rhythm for the first few catches before they let muscle memory take over.
| Indicator Position | Recommended Action | Risk if Ignored |
|---|---|---|
| Bottom of zone | Click once, immediately | Indicator falls, meter stalls |
| Middle of zone | Wait 0.2 to 0.4 sec, then click | Overshoot wastes stamina-like charge |
| Top of zone | Pause, do not click | Indicator escapes zone, catch fails |
| Outside zone (any side) | Wait until re-entry | All clicks are wasted |
Matching Cadence to Rod Tier
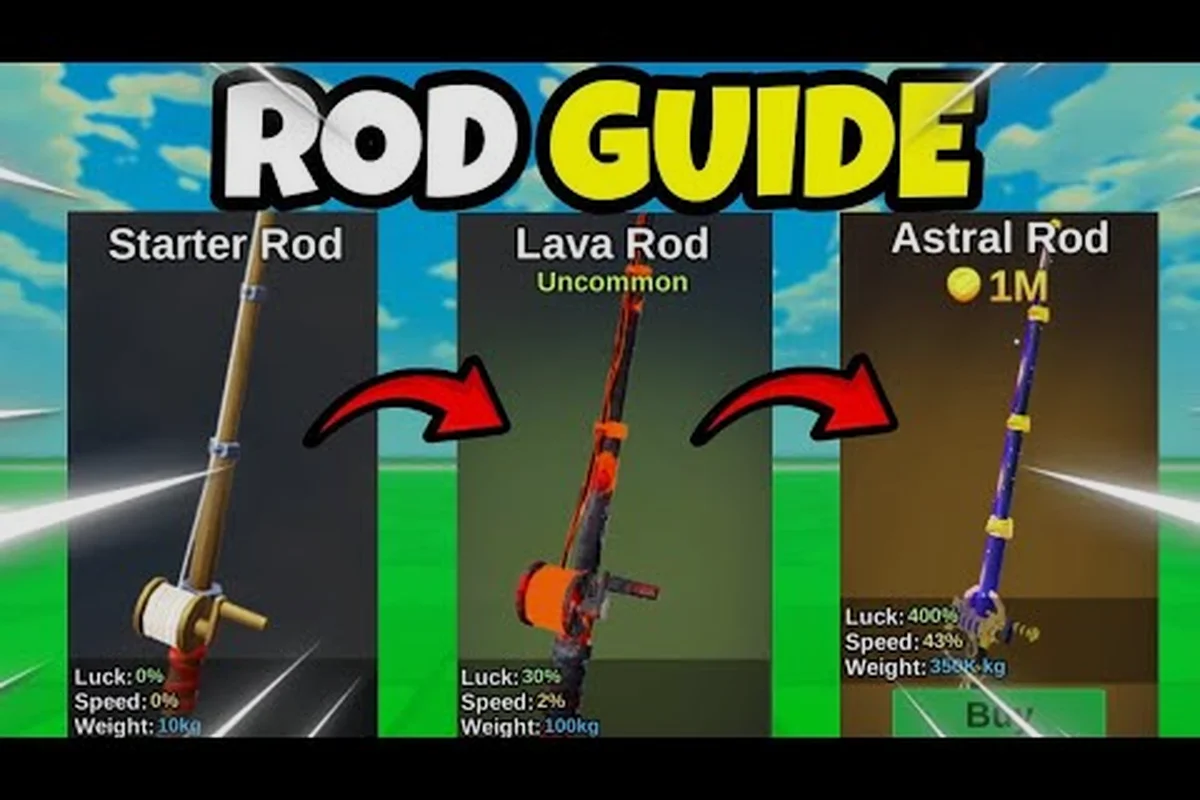
Rod tier changes how forgiving the bar is and how fast the indicator drifts. A starter rod has a slow drift, which makes it perfect for learning cadence because missed clicks barely cost progress. Mid-game rods have a medium drift and a tighter catch zone, so the player has to be more precise. End-game rods paired with luck boosts can pull rare fish that shake the indicator harder and drift faster, which is why veterans click faster but still deliberately. A good fish it exploring guide breaks down the difference between the starter zone and the late-game arcadia-tier waters, including how each island nudges the cadence window.
| Rod Tier | Drift Speed | Catch Zone Width | Recommended Cadence |
|---|---|---|---|
| Starter | Slow | Wide | 1.5 clicks/sec, very forgiving |
| Mid-game | Medium | Standard | 2 to 2.5 clicks/sec |
| End-game | Fast | Narrow | 2.5 to 3 clicks/sec, tight rhythm |
| Event / Limited | Variable | Very narrow | Adaptive, watch icon first |
What Luck Actually Does
A frequent question from new players is what luck actually does in Fish It, and the answer is more layered than a single percentage. Luck is not just a number that multiplies the size of a fish or the value of a sale; it is a hidden probability multiplier that affects rare spawns, mutation rolls, pet egg drops and even how forgiving the catch zone is during a tense bite. This is why two players can cast at the same spot with the same rod and walk away with wildly different results.
The Core Luck Effects
At its core, luck raises the chance of pulling a higher-rarity fish from the spawn table, which means a luck-30 player and a luck-300 player fishing the same pool will see very different rarity distributions. Luck also boosts the odds of triggering mutations, hatching rarer pets from a pet egg, and rolling special variant tags such as the new 8-Bit mutation or the Shiny variants that surfaced in recent updates. When a player asks "fish it what does luck do," the practical answer is that it lifts the floor of every probabilistic outcome in the game without changing the inputs that drive them.
| Luck Source | Approximate Boost | Duration | Stacks With |
|---|---|---|---|
| Rod base luck | Permanent, by tier | Always | Bait, potions, pets |
| Luck Potion (from codes) | Medium, short window | Minutes | Rod, pets |
| Mutation Potion | High, narrow window | Minutes | Bait, server buffs |
| Pet luck buff (e.g. Pixel Pilot) | Small but permanent | Always | Rod, potions |
| Server weather / event | Variable | Event window | Rod, pets, potions |
Why Luck Changes Cadence Pressure
Luck also has a hidden effect on the reel bar: a higher luck value makes the indicator's drift slightly more forgiving and widens the catch zone by a small margin, according to player-reported testing. This is one reason a player with a stacked luck setup feels like the bar is easier than the same player without buffs, even though the visible bar looks identical. The fish it ultimate guide approach is therefore to treat luck as a soft multiplier on cadence: a luck-stacked player can afford a less perfect rhythm, while a luck-starved player has to click perfectly to squeeze value out of each cast.
Stacking Patience, Luck and Cadence Together
Knowing cadence and knowing luck are two halves of the same equation, and the players who stack them consistently outperform players who optimize only one. The order of operations is simple: prepare the build first, then fish patiently, and only spend luck boosts when the patience window is open.
The Pre-Cast Checklist
Before clicking the cast button, the player should run a quick checklist. Make sure the rod is the highest-tier the player owns or has borrowed, that the bait matches the target fish family, that any active luck potion is still in its duration window, and that the equipped pet contributes a relevant buff. Skipping this step is the most common reason players blame their luck when the real issue is the build. A reliable fish it complete guide approach is to keep a saved loadout for low-rarity farming and another for rare-fish hunting, then swap between them based on the patience window.
| Step | Action | Why It Matters |
|---|---|---|
| 1 | Equip highest-tier rod available | Higher base luck, tighter cadence window |
| 2 | Match bait to target fish | Pre-filters spawn table toward goal |
| 3 | Activate luck potion if active | Boosts rare spawn odds for short window |
| 4 | Confirm pet buff (e.g. Void Panther) | Adds permanent luck floor |
| 5 | Pick a quiet server with stable ping | Lower ping = steadier cadence |
| 6 | Stand in a known hotspot | Some islands have better odds per cast |
Spending the Patience Window
Once the player is in position, the patience window opens. A patience window is the stretch of time during which a luck buff is active and the player is willing to sit through slower catches without switching spots. The instinct to swap islands or rods every 30 seconds is the enemy of patience, because every swap resets the spawn table and burns time. The disciplined move is to commit to one spot for at least 10 to 15 minutes, run the cadence as cleanly as possible, and only swap when a real upgrade (new rod tier, better bait, new event island) becomes available. Players who grind this way tend to bank more coins per hour than players who chase every shiny that flashes on the screen.
| Patience Window Length | Expected Catch Profile | Risk if Abandoned Early |
|---|---|---|
| 0 to 5 minutes | Mixed trash + early signal | Low; safe to bail |
| 5 to 15 minutes | Rising rarity curve, first rare | Medium; don't swap yet |
| 15 to 30 minutes | Steady rare hits, mutation rolls | High; you're in the sweet spot |
| 30+ minutes | Diminishing returns, server reset risk | High; consider relocating |
Advanced Timing and Server Conditions
Once the basics are solid, the next layer of Fish It reel in timing involves reading the server and the session itself. Ping, population, weather and the active event island all change the rhythm in ways that a casual player never notices but a grinder feels immediately.
Ping, Server Population and Indicator Drift
Higher ping makes the indicator drift feel sluggish because each click input lands a few milliseconds later than the client thinks it should. On high-ping sessions, a player who clicks on a steady 2-per-second rhythm will feel like the bar is harder, because the input lag pushes the effective click rate below the indicator's drift speed. The fix is to drop the cadence to 1.5 clicks per second on laggy sessions and lean on the luck multipliers to make up the loss. Conversely, on low-ping private servers or local-region servers, a player can push to 3 clicks per second and stay inside the zone cleanly. This kind of context-sensitive rhythm is exactly what a fish it advanced tips resource usually recommends, because grinding well is as much about session selection as it is about the rod in hand.
Event Islands and Limited-Time Windows
Limited-time islands such as Arcadia change the underlying spawn table and usually bring a faster indicator drift, because the new fish tend to be rarer and heavier on the bar. During these windows, the right move is to fish with a slightly faster cadence, a fully stacked luck loadout (potions, pets, bait) and a shorter patience window per spot, because the event often rerolls the table every few minutes. The community-reported 10 Insane Tips and Tricks video covers the same idea: during events, players who burn potions early and reroll spots aggressively tend to bank more event-exclusive fish than players who try to play the long patience game. Pairing that approach with a steady cadence is what turns an event grind from a coin drain into a coin engine.
Frequently Asked Questions
What is the best Fish It reel in timing for a beginner?
The best beginner cadence is 2 clicks per second with a half-second pause whenever the fish indicator reaches the top of the catch zone. This rhythm keeps the indicator inside the zone without overshooting and works on almost every starter rod, so new players can build muscle memory before moving to higher-tier rods with faster drift speeds.
What does luck actually do in Fish It?
Luck raises the chance of pulling a higher-rarity fish, rolling a mutation, hatching a rare pet and getting slightly more forgiving catch-zone behavior during a bite. It does not directly change coin value, but the higher-rarity fish it unlocks sell for far more, which is why luck is the single most important stat to stack on a grind build.
How do I make my Fish It reel cadence feel smoother?
Focus on watching the fish indicator instead of the click button, and only click when the indicator is in the lower half of the catch zone. Practicing this for 10 to 15 minutes on a starter rod will build the rhythm, and after that the same cadence transfers to mid- and end-game rods with only minor speed adjustments.
Should I use a luck potion every time I fish in Fish It?
No, luck potions are best saved for patience windows when the player is already in a good spot with a strong rod and matching bait, because stacking every available buff during those windows extracts the most value per cast. Burning potions on short, unfocused grinds wastes the duration and dilutes the long-term coin curve.
Is there a single fish it ultimate guide loadout I should copy?
There is no one-size-fits-all loadout, but a reliable template is a high-tier rod with the best available base luck, a bait matched to the target fish family, a luck potion active during the patience window, and a pet like the Pixel Pilot that adds a small permanent luck floor. A balanced loadout like this lets the player focus on cadence instead of fighting the bar, which is the entire point of grinding smart.