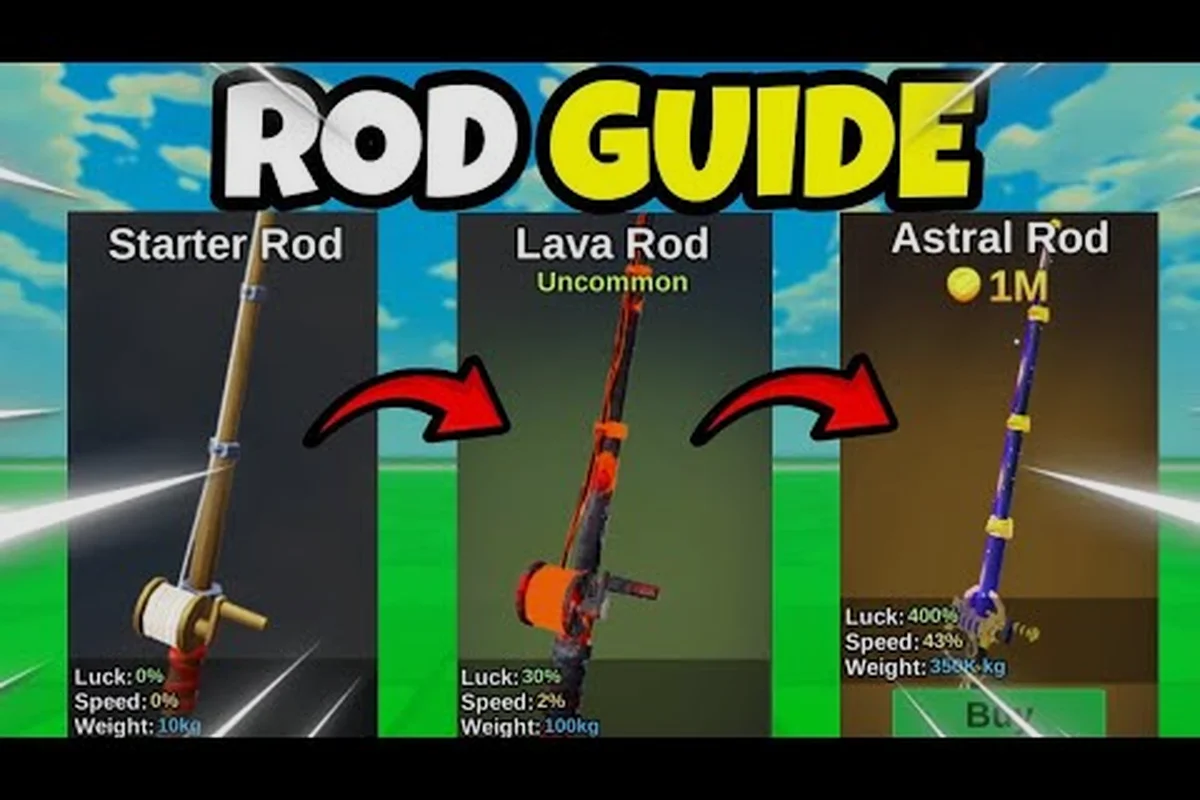
Picking the wrong rod in Fish It is one of the fastest ways to stall your early-game economy, because every catch you miss is Coins you never earn. The full catalog of Fish It rod stats spans a wide range of luck bonuses, unlock conditions, and price tags, which makes the upgrade path feel opaque until you actually compare numbers side by side. This breakdown lines up every standard and limited rod model on luck, cost, and rarity so you can plan a smart coin route from starter to endgame. A practical starting point is the starter rod progression guide, which covers how to budget your first upgrades before the grind begins.
Core Fish It Rod Stats Explained
The stat sheet for every rod in Fish It is built on a handful of numbers that quietly drive your entire catch rate. Once you understand what each value means, every rod in the shop becomes a clear upgrade-or-skip decision.
What Each Rod Stat Actually Does
Four core numbers appear on virtually every rod card: Luck, Control, Speed, and Resilience. Luck is the headline stat and the one most players chase, because a higher luck value increases the chance that your next cast rolls into a rarer, more valuable fish tier. Control affects how steady the mini-game bar behaves during reeling, which matters most when fighting larger fish. Speed changes how fast the bar moves and how quickly the cast bar fills, while Resilience dampens the size of the penalty you take when a fish struggles.
The role of Luck in the economy is direct: doubling your luck on a given spot roughly doubles the average value of what you pull out, so a mid-priced rod with 2x luck is often a much better investment than a top-shelf rod you can't yet afford. Control and Speed are quality-of-life stats, and they matter more once you start pushing into heavier fish that drag the bar aggressively. Resilience is the stat most beginners ignore, but it becomes decisive on the Withering Core and Arcadia islands where oversized fish hammer your progress bar.
How Luck Multipliers Translate Into Coins
Coins in Fish It come almost entirely from selling catches, so the practical value of a luck jump is measured in average sell price per cast. A rod with 1x luck at a starter island might average a few hundred Coins per catch, while the same spot fished with a 3x luck rod can push that average into the low thousands. Across a long session, that gap easily decides whether you reach the next rod purchase or stay stuck.
| Stat | Effect On Catch | Why It Matters |
|---|---|---|
| Luck | Higher chance of rare fish rolls | Direct multiplier on sell value |
| Control | Smoother reel mini-game | Fewer lost catches on big fish |
| Speed | Faster bar movement | More casts per minute |
| Resilience | Reduced struggle penalty | Better finish rate on heavy fish |
The numbers above are general community-reported behavior, so exact averages shift with location, current event multipliers, and active potions. Still, the directional pattern holds across every island, which is why Fish It rod stats are usually compared on luck first and every other stat second.
Comparing Standard Rod Models
Standard rods span four affordability tiers, with luck bonuses climbing from roughly 30% on the bottom-tier Carbon Rod to about 70% on the mid-game Aurora Rod, and finally reaching 90%+ on the top-end Steady Rod and Trident Rod. The in-game currency cost scales almost linearly with that luck gain, so each purchase represents a clear ROI trade-off: a player fishing low-rarity fish at the Snowcap Island pond will see far more benefit from a Steady Rod upgrade than someone still grinding common-only pools at the Starter Pond. This predictable luck-to-price curve is also why most players target Trident Rod first, since it unlocks higher rarity rolls without burning the budget required for secret-tier alternatives.
Starter To Mid-Tier Performance Table
| Rod Model | Approx. Luck | Approx. Cost | Rarity Tier |
|---|---|---|---|
| Wooden Rod | 1x | Free (starter) | Common |
| Plastic Rod | 1.3x | ~900 Coins | Common |
| Carbon Rod | 1.7x | ~3,500 Coins | Uncommon |
| Fast Rod | 2x | ~7,500 Coins | Uncommon |
| Lucky Rod | 2.3x | ~15,000 Coins | Rare |
The exact cost numbers come from community testing and may shift with updates, but the relative order is stable. Jumping from the Wooden Rod to the Lucky Rod is the single biggest bang-for-Coins leap most players make, because it roughly triples your average sell value at starter spots. Once you push past the Lucky Rod, the game starts gating further upgrades behind quest completions, events, or shop rotations.
If you're trying to figure out which tier to grind toward, the best rod for rare catches article breaks down how higher luck values translate into actual rare fish odds at each island. The general rule from players is to never spend more than half your liquid Coins on a single rod purchase, because upgrades are incremental and you need cash to replace baits and potions as well.
Mid-Tier To Advanced Standard Rods
Past the Lucky Rod, the standard catalog introduces the Carbon Pro, the Trident Rod, and the Steady Rod, each leaning into a different stat profile. The Carbon Pro pushes luck further while keeping the cost approachable for mid-game wallets, and the Trident Rod leans into Control and Resilience for players who keep losing catches on heavier fish.
| Rod Model | Approx. Luck | Approx. Cost | Strength |
|---|---|---|---|
| Carbon Pro | 2.8x | ~65,000 Coins | Balanced upgrade |
| Trident Rod | 2.5x | ~95,000 Coins | Strong Control |
| Steady Rod | 2.4x | ~85,000 Coins | High Resilience |
These three rods form the practical mid-game wall, and the luck gap from the Lucky Rod up to the Carbon Pro is where most players spend the largest stretch of time. Reports from the official Fish It game page confirm that the upgrade ladder continues to expand with each major patch, so these numbers should be treated as a snapshot rather than a permanent stat sheet.
Secret, Mythic, And Event-Limited Rods
Once you move past the standard catalog, Fish It opens up a much more expensive and more exotic tier of rods, and these are the ones most players screenshot on social media. The Fish It secret rods sit at the very top of this list and usually combine high luck with a special perk that triggers a unique effect during fishing.
Mythic And Secret Rod Rarity Comparison
| Rod Model | Approx. Luck | Unlock Path | Rarity |
|---|---|---|---|
| Ghostfinn Rod | 3.5x | Limited event / shop | Mythic |
| Element Rod | 4x | Event quest chain | Mythic |
| Iris Rod | 4.5x | Hidden quest | Secret |
| Withering Rod | 5x | Withering Core drop | Secret |
| Turbo Shrimp Rod | 4.2x | Tournament reward | Mythic |
A detailed breakdown of every mythic and secret rod covers how each one is actually obtained, but the broad picture is that these rods are not purchased with Coins alone. They tend to require completing a multi-step quest, winning a limited event, or fishing up a specific rare fish in a specific location. Because of that, the price tag on these rods is often better measured in time invested rather than raw Coin cost.
The Iris Rod and Withering Rod are the two highest-impact secret rods reported by players, with luck values that roughly double the Carbon Pro baseline. That kind of jump is what enables consistent catches of high-tier fish like the Forgotten Hydras, which the Forgotten Hydras update coverage shows can carry an entire endgame economy when farmed properly.
Why Fish It Rod Rarity Tiers Matter
Rarity tier in Fish It is more than a color label on the rod card, because each tier unlocks additional features. Mythic rods often come with a special passive that grants bonus luck under specific conditions, such as time of day, weather, or island. Secret rods tend to push the luck ceiling even higher and pair that with a unique cosmetic effect that makes your cast stand out.
| Rarity | Typical Luck Range | Special Feature |
|---|---|---|
| Common | 1x – 1.3x | None |
| Uncommon | 1.5x – 2x | None |
| Rare | 2x – 2.5x | Slight control bonus |
| Epic | 2.5x – 3.5x | Conditional luck |
| Mythic | 3.5x – 4.5x | Event-tuned passive |
| Secret | 4.5x – 5x+ | Hidden quest reward |
Rarity also affects how much of your luck bonus actually applies to high-rarity fish, because the rare tiers often include a small multiplier on top of the base luck value. Players who ignore rarity and just stack the highest base-luck number can miss out on a meaningful chunk of value.
Purchasing Rods From the In-Game Shop
Knowing how the purchase flow actually works saves a lot of time once you've saved up enough Coins for a real upgrade. The system is straightforward once you've seen it once, but it has a few quirks that catch new players off guard.
Step-By-Step Rod Purchase Process
-
Open the Shop by interacting with the red shopping basket near the main dock on the starter island.
-
Switch to the Rods tab in the shop interface, since the default view usually shows baits and potions first.
-
Browse the available rods; some models appear only after you've reached a specific player level or completed a prerequisite quest.
-
Confirm the purchase with the on-screen button, which deducts Coins from your wallet instantly and adds the rod to your inventory.
-
Equip the new rod from the inventory panel, and your luck, control, speed, and resilience values update immediately.
The Fish It how to buy rods flow gets faster the more Coins you have, because some shops rotate stock on a timer and waiting a few minutes can surface a higher-luck model. Most players report that the Shop rotation cycle is short enough to justify checking back periodically rather than grinding out a single rod purchase immediately.
Budgeting Coins For Your First Real Upgrade
Most of the early-game rod ladder can be cleared without event grinding, but only if you manage your Coin spending carefully. Players who blow a big chunk of their bank on a single mid-tier rod often stall for hours waiting to rebuild, while players who keep at least 30% of their wallet in reserve can keep buying baits and luck potions to maintain steady progress.
| Bankroll Range | Recommended Next Rod | Reasoning |
|---|---|---|
| Under 1,000 | Stay on Wooden Rod | Not enough for next tier |
| 1,000 – 4,000 | Buy Plastic Rod | Cheap luck boost |
| 4,000 – 10,000 | Save for Carbon Rod | Worth waiting |
| 10,000 – 20,000 | Buy Fast or Lucky Rod | Mid-game jump |
| 20,000+ | Plan toward Carbon Pro | Late mid-game |
These Fish It rod costs reflect community-reported averages and will shift with updates, but the underlying logic stays the same: upgrade when your bankroll comfortably covers the rod plus one more full bait and potion cycle. In practice, that means holding back roughly 2,500 Coins beyond the listed price — enough for a Flake bait restock (around 1,200) and two luck potions (about 300 each) — so a single bad catch streak won't force you back to the Wooden Rod. Skipping that buffer is the most common reason players report a "dry patch" right after buying a Carbon or Lucky Rod, since every cast without a buff chip eats directly into upgrade progress. Treat the cost table as a minimum, not a target, and your rod luck gains will compound far more smoothly across the ladder.
Planning A Long-Term Rod Progression Path
Once you have access to the mid-tier and above, the question stops being "which rod do I buy next" and becomes "which rod do I grind toward over the next week." This is where reading the Fish It rod prices table in context actually pays off, because the gap between a mid-tier rod and a secret rod can be enormous.
Mapping Your Upgrade Sequence
The smart approach, based on what experienced players report on the Fish Atelier community group, is to set a target rod, calculate the Coin cost, and then set a daily Coin income target that gets you there in a reasonable window. Switching islands once your rod's luck value outgrows the spot you're fishing is just as important, because a high-luck rod at a low-rarity island wastes most of its bonus on a low ceiling.
A practical sequence looks like this for most players, and it scales cleanly across the rod rarity tiers: start with a Plastic Rod baseline of around 50 luck to learn timing and Coin economy, then graduate to the Lucky Rod (roughly 150 luck) once your reserves stabilize above 15,000c, push into the Carbon Rod's mid-range 250–400 luck band to clear mid-tier fish, and only then commit to the 1,200+ luck mythic bracket where stats actually reshape catch outcomes rather than just speeding up basic grinding.
-
Grind starter island until you can comfortably afford the Plastic Rod.
-
Push toward the Lucky Rod once your bankroll is consistently above 15,000 Coins.
-
Save a long stretch for the Carbon Pro, since it's the bridge between standard and mythic.
-
Chase the Ghostfinn Rod during its event window if your playtime aligns, since it's a major luck jump at a relatively achievable unlock cost.
-
Treat the Iris Rod and Withering Rod as long-term goals, since they require multi-step quests and endgame-level luck to pursue efficiently.
If you're stuck on whether to chase a specific high-tier rod, the endgame rod acquisition guide walks through the exact unlock paths for the Withering Rod, Turbo Shrimp Rod, and Iris Rod, including which quests to start first.
Using Event And Code Boosts To Shorten The Grind
Codes and event multipliers can compress the entire rod progression timeline, and the active codes roundup shows that rewards center on luck potions, mutation potions, coin boosts, and limited baits. Stacking a luck potion with a high-luck rod is one of the most efficient ways to make progress toward saving up for the next rod, because the effective value of every catch jumps substantially.
Timing your rod purchases to land at the tail end of an event can also be smart, because event rewards often include direct Coin grants that push you across the threshold for an upgrade you were one or two sessions away from. The general exploration and farming guide covers the broader loop of moving between islands, but for rods specifically, the takeaway is that the upgrade you can afford today is almost always better than the upgrade you're saving for next week, because more catches now means more Coins later.
Frequently Asked Questions
What is the best rod to start with in Fish It?
The Wooden Rod is what every player starts with, but the Plastic Rod is the first real upgrade because it raises your luck to about 1.3x for roughly 900 Coins. That early jump boosts your average sell value noticeably without emptying your wallet, which is critical for setting up the rest of the mid-game grind. Save the bigger upgrades until your bankroll consistently sits above 5,000 Coins.
How much do Fish It rod prices change between updates?
Coin prices for standard rods tend to stay stable across patches, but luck values and unlock conditions are rebalanced more often. Community testing suggests prices shift only when the developer adds a new rod tier or rotates the shop, so planning around the current Fish It rod costs is usually safe for at least a full patch cycle.
Are secret rods worth the grind compared to mythic rods?
Secret rods like the Iris Rod and Withering Rod push luck up to roughly 5x, which is meaningfully higher than most mythic options in the 3.5x – 4.5x range. The catch is that they require multi-step hidden quests or endgame island drops, so they're worth chasing only after your standard and mythic rods are already secured. Players who try to skip straight to secret rods often stall in the early-to-mid game because they don't have the base economy to support the grind.
How do luck potions stack with rod luck?
Luck potions multiply on top of your rod's base luck, so a 4x luck rod combined with a 2x luck potion behaves like an 8x effective luck at that spot. This is the most efficient stacking players have access to, and timing potion use for harder-to-reach spots is the easiest way to shortcut the wait for a higher-tier rod. Most players save potions for rods that are already at the Lucky Rod tier or above.